Monday, January 31, 2011

Painted Muslin Hearts

I'm super excited to be guest blogging over at At Home With K today!


I'm sharing a tutorial on making painted muslin hearts as part of Kindra's Be Mine Bonanza!
Head on over to Kindra's blog for the full tutorial.


Linking up at...

Hugs and Kisses Valentine Party at It's a Blog Party

Tuesday, January 25, 2011

A Call for Cushions!

Some of you may know my friend Carol from her blog Naturally Carol. Carol lives in Queensland, Australia. Fortunately, Carol and her family have been spared any harm from the waters of the Queensland floods. Unfortunately, tens of thousands of people must rebuild their lives after losing their homes, their businesses, their livelihoods... the lives they had built for themselves.

In response to the flooding in Carol's beloved Australia, she has put out A Call for Cushions. She is collecting handmade pillows for flood-affected people and families in Queensland. It may seem like a small thing, but when someone has lost everything, a piece of "home", a handmade gift, a small gesture can brighten even the darkest of days.

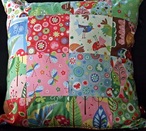
summertime front tweetcushion

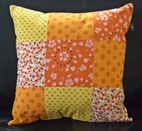
photos: Naturally Carol

sunshine cushion

I have committed to sending two pillows to Carol. Please think before you say, "I don't have time right now." This doesn't have to happen "right now". It will be months before many people will have a place to call home again. If you can just commit to making one pillow in the next two to three months, imagine the little ray of sunshine that it will bring to a family, to help restart their lives.

Click here for all of the information.

Please put this on your to-do list. You will never regret it.

Friday, January 21, 2011

I’m Being Featured on Remodelaholic!

My sewing closet is being featured on Remodelaholic tonight!
Please take a minute to pop over there and check it out!


If you are visiting from Remodelaholic, thanks for stopping by to visit.
Glad to have you here. Hope you stay a bit and take a look around.

Thanks so much for the feature, Cassity!Gwen_New_Signature

Thursday, January 20, 2011

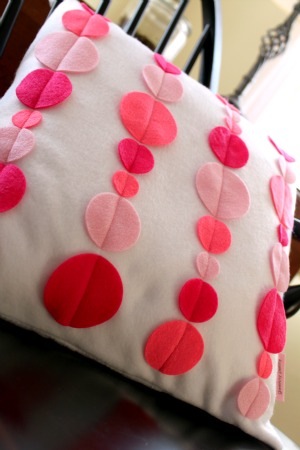
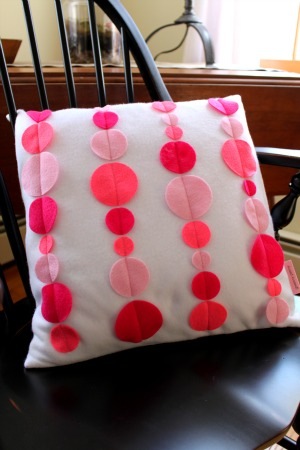
Dot, Dot, Dot Valentine Pillow

IMG_3131E
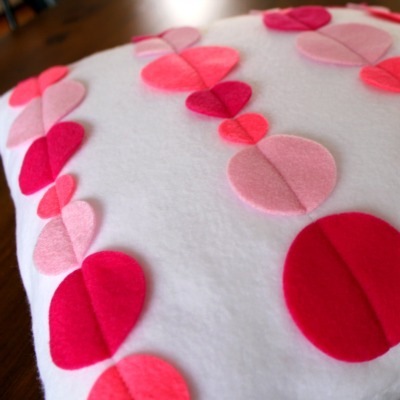
I’m not a big fan of pink, but for some reason when I envisioned this pillow, it was pink and white. Seeing that I have two little girls, pink has managed to make it’s way into my home. It is my three year old’s favorite color. She was thrilled to see this pillow when she woke up this morning, so I guess I can live with a little more pink in my life until after Valentine’s Day is over.

IMG_3129E
This was the quickest pillow I have ever made. Here’s the how-to…


Materials and supplies needed:
  • background fabric - ½ yd
  • felt - 3 different colors
  • pins
  • thread
  • 16″ square pillow form

Instructions:

First, cut your background fabric into three pieces: 17″x17″, 17″x14″, 17″x10″. The 17″x17″ piece will be the front, and the other two pieces will make up the envelope closure on the back. I used white fleece because I still have an enormous pile of it left over from my daughter’s Pillsbury Doughboy costume. It will be years before that stuff is gone.

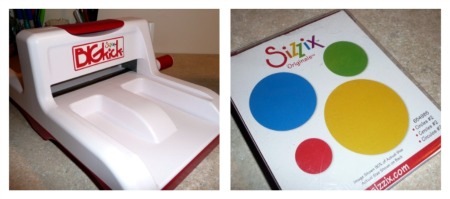
Now on to the circles. I cut my circles using my good old Sizzix Big Kick die cutter. If you have one of those fancy-dancy new electronic cutters, you could probably use that. Or cut them all by hand. I used 35 circles on my pillow. You may need more or less depending on the size of your circles and how you lay them out.

SizzixCollage
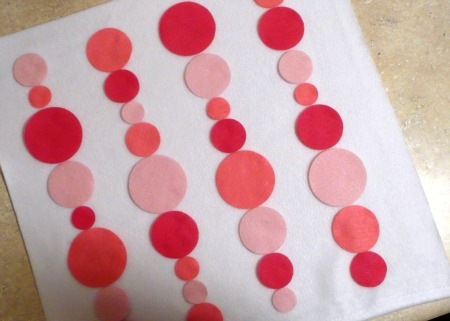
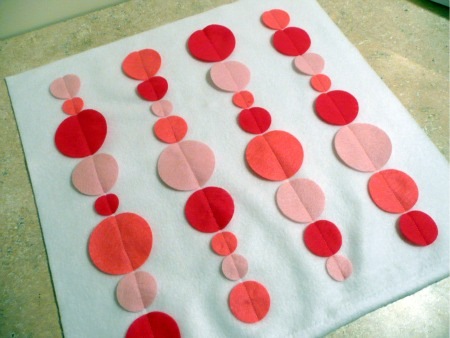
Start to lay out the circles in four columns on the 17″x17″ piece of background fabric that will be the front of your pillow. I avoided putting two circles of the same shade of pink next to each other in the same column. Also, don't place any circles within 1" of the edges of the pillow.

P1080510E
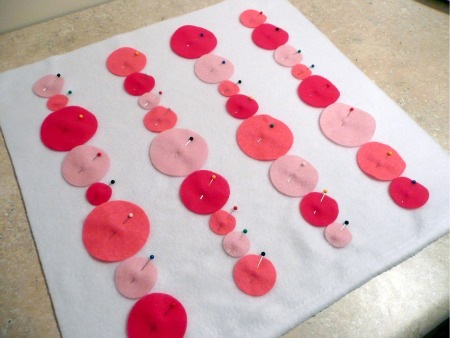
Play around with the layout. Once you have everything where you want it, pin each circle to the background fabric.

P1080519E
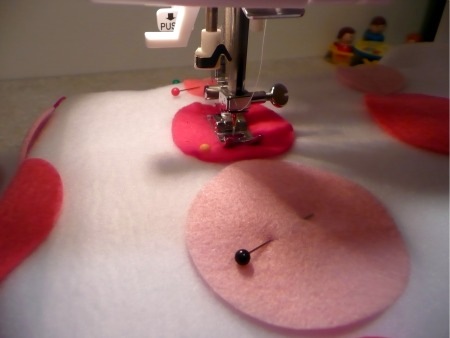
Next, sew a straight line right through the center of each column of circles.

P1080524E
When you are done sewing all four columns, it will look like this…

P1080527E
At this point you may want to hem one of the 17″ sides of both the 17″x14″ and the 17″x10″ pieces of background fabric. I didn’t bother to hem mine because I used fleece.

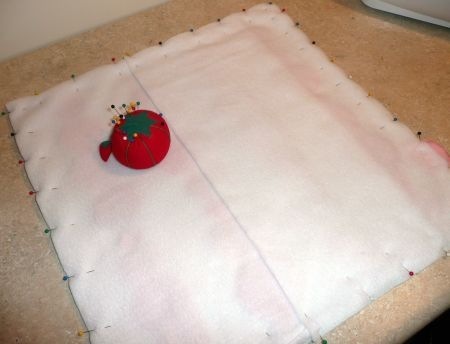
With the circles facing up, lay your 17″x14″ piece of background fabric on top of the circles, right side down, along one side of the pillow (If you hemmed this piece, your hem should be the side that is closer to the middle of the pillow). Lay your 17″x10″ piece on top of that, right side down, along the other side of the pillow (If you hemmed this piece, your hem should be the side that is closer to the middle of the pillow). Pin all three layers together.

P1080529E
Sew all the way around the outside of the pillow using a ¼″ seam allowance. Clip your corners, and turn the pillow right side out.

IMG_3149SQ
And of course I added one of my homemade sewing labels (learn how to make them here).

IMG_3133E
I like the idea of the pillow, but the pink doesn’t really fit in with my decor. So, this pillow is making it’s way to my daughter’s bedroom, which will make her very, very happy. I think I’ll be sticking with red for any future Valentine’s Day decorations I make.


Linking up to these great parties…
giveawaysA Crafty Soiree

Wednesday, January 19, 2011

A Change Will Do You Good

Notice anything new around here? If you're checking out this post in a reader, click on over to my blog and check out my awesome new blog design! I'm loving it!

If you are a regular reader of my blog, you've heard of my friend Kristin from Betty Crocker Wannabe. She just started her own blog design business called Simply Klassic Blog Design, and she designed all of this lovely goodness for me.


Kristin is super talented and amazing to work with. The first thing I had to do was fill out a questionnaire so she could get an idea of my likes and dislikes and find out exactly what I was looking for. Then she got to work. When she was done with the initial concept, I actually got to see it live on a test blog, which was great! From there I had some minor tweaks that I wanted here and there, and she was able to do absolutely everything that I asked for. When the design was complete, and I was happy with everything, installation took less than 20 minutes. Amazing! Kristin's prices are really reasonable, too. She even has an à la carte menu of services to choose from, in case you want a mini makeover.

My blog makeover was a really great experience from start to finish. Kristin does her best to make you happy. Like she told me, "It's YOUR blog, and YOU have to be happy with it!" She has a really great attitude, she's very professional, and she does a fantastic job. Head over to Simply Klassic to see a portfolio of the blogs she has designed.

So, would you like a makeover for your blog? Would you like a makeover for FREE? Kristin is currently giving away a Deluxe Blogger Package (a $60 value!) on her personal blog, Betty Crocker Wannabe. Stop over there to enter for a chance to win! The giveaway closes on Friday, January 21st at 11:59 PM (PST). She's also giving a discount of 20% to the first five customers who place an order. So if you're thinking about doing it, now is the time! A change will do you good...

Monday, January 17, 2011

I'm on The DIY Show Off!

My new sewing closet is being featured on The DIY Show Off! Go check it out here.


The DIY Show Off


If you're visiting from The DIY Show Off, welcome! Thanks for stopping by. Hope you enjoy!

My New Sewing Closet!

I am so excited to share my new sewing closet with you today! I wish I could just sit in there and stare at it all day. As you may remember, my motivation to do anything creative has been non-existent since the holidays. A good part of this was due to the fact that my sewing area was a complete wreck. About a week and a half ago I committed myself to getting my sewing area remodeled and organized by the end of January. Well, I didn't waste any time. I have to first and foremost thank my husband for helping me to make it all possible. It took us a full weekend to get everything painted and built and then I took last week to get everything organized and put away. I can't stand to wait any longer! Here's the before and after...


Isn't it incredible?! I never imagined it would turn out this great. I'll tell you a little bit about the building process, and then I'll take you on a little tour of the finished closet.

First thing, I completely emptied the closet and removed the shelf and shelf supports that were in the closet. Once everything was out, I spackled all the holes in the walls. After that dried, I sanded down the spackle and then used a damp cloth to clean all the spackle dust from the walls and trim.


Next up was paint. I decided to go with Linen White because there is some sitting in our basement from the previous owners of our house (in other words, it was free!) I wanted a fresh, crisp look. After I taped all the trim and rolled on the paint, I had an empty closet with a clean canvas as a starting point.


Those two boards leaning against the wall are the side supports for the new bottom shelf. I painted those when I painted the walls.

Next came the shelving. My husband and I installed a shelf across the entire width of the closet. We then attached a 12.5" tall piece of the same board against the wall on either end of the shelf. We were then able to add a second shelf on top of those boards. I then measured along the bottom shelf every 14.5", and we installed three 12.5" tall dividers between the two shelves. I decided on the dividers to help organize the shelf and contain all of my craft, sewing, and decorating books.


Once the dividers were up, we added two metal brackets to help support the center of the shelf.

Next came the desktop. We were originally planning to use a couple of planks and lay them side by side, but we ended up springing for a piece of laminate countertop at Home Depot. It was $66, but it was well worth the money. It provides a really nice surface to sew on. In order to support the countertop, we had to build a frame out of 2x4s. Tip: Make sure each board in your frame is level before you attach it. This will ensure that your countertop is level when you place it on the frame.


The countertop itself was too deep for the closet, so we used a circular saw to cut off the backsplash so that it would fit. It was also about a foot and a half too long, so we had to cut down the length of it. We were scared to cut the countertop, but it was super easy! Here's what you do: determine where you need to cut, and place a strip of masking tape or painter's tape centered over the cut and along the entire length of the cut. Mark your cutting line right on the tape, and cut right through the tape/countertop. Works like a charm! Use the tape, otherwise you might end up cracking or splintering the laminate.

After the countertop was cut to the right size on the third try, we set it on top of the frame and screwed through the 2x4 frame right into the countertop. The final piece was a framed pegboard that was hanging inside one of the closets when we bought our house. I positioned it on the wall above the countertop so that it would cover the metal support braces under the shelves. The very last step was to install an electrical outlet in the closet for a light and my sewing machine. And voila, I've got a sewing closet!


Now for a little tour of my finished little space...

The outer shelf cubbies hold my craft, sewing, and decorating books. The two center cubbies hold boxes filled with buttons, elastic, glues, scrapbook paper, paints, glue guns, and paper punches. The very top shelf holds all of my pillow forms, polyfil, and baskets full of extra supplies. It's kind of nice because that area is sort of hidden from view from outside the closet. Under the desktop are three rolling carts with drawers. This is where all of my fabric, interfacing, and batting reside.

Here is the desktop area...


The jars on the desk are filled with ribbon, zippers, ric rac, Sharpies, glue sticks, pens, and pencils. I also have a little notepad cube and pin cushion.

My pegboard holds my scissors, rotary cutters, bias tape maker, rulers, embroidery hoops, twine, small spools of ribbon, a clipboard for jotting down ideas, and a little palm tree (just to make me smile).

Here's the view to the left...


The little clothesline displays some of my oldest daughter's artwork. The tack board has cards from some of my favorite Etsy shops, including a letterpress "Hello" card that came with an order from this Etsy shop.

Here's a closer look at the decorations on the wall. Remember when I bought this old Hasbro Necchi Supernova toy sewing machine last fall? I finally have a proper place to display it...


The little shelf came from Target. I taped little paper flags onto the front. And to the right is my vintage Fisher Price Little People woman at her sewing machine (although I hate to say vintage because I had one of these as a kid, and it makes me feel old). Love her...


I also have a couple of framed pieces that I really like. The first, "Get Excited and Make Things", I found through Alissa at 33 Shades of Green. It's a free printable from Pretty Procrastination which can be found here (in four different colors!). The second, "Just Be", I made myself. It's something I'm trying to remind myself to work on this year.


I also have a ginormous button that I bought at JoAnn's last fall, and two little embroidery hoops with pieces of some of my favorite Heather Ross fabrics in them.


And now the view to the right...


All of my thread is stored on the rack on the wall. The number 4 vintage marquee number was an Etsy purchase a while back. And in the very back corner of the desktop is a little wooden box with drawers for storing more sewing tools. On top is this cute little metal sewing machine that I recently dug out of the basement...


I don't even know where it came from. I just always remember it sitting on a shelf in my room growing up. I had completely forgotten about it. I found it when I went looking for the thimbles. I used to collect thimbles when I was a kid, and these are two of my favorites.

This completes the tour of my new sewing closet. If anyone is interested in building something like this, and you have any questions, please feel free to email me. I'm certainly not an expert, but I can tell you what worked for us. This is a great way to carve out your own sewing space if you don't have an extra room in your house or if you live in an apartment.

Thanks so much for stopping by today! And an extra big thanks to those of you who stuck it out through the whole post... it was a long one. Now that I can get to my sewing machine, I've got some work to do!


I'm linking up...


Get Your Craft On Tuesday
Show Off Your Space at Tatertots & Jello

Thursday, January 13, 2011

Be Mine Bonanza

I have something really neat to tell you about today. In preparation for Valentine's Day, 
my friend Kindra is going to be hosting a Be Mine Bonanza over on her blog At Home With K.


The event will run from January 30th through February 5th and will feature
seven different love-themed tutorials by seven different bloggers (including me!).
I'm so thrilled that Kindra asked me to be a part of this.
And don't you just love the blog button for the event?!
So mark your calendars and make sure you check out the Be Mine Bonanza!

Related Posts with Thumbnails